How to Make Paper Poinsettias with Cricut and FREE Template.
In this step-by-step tutorial you will learn how to make paper poinsettias with the Cricut Explore Air or Maker machine . You will also learn how to make a beautiful Christmas poinsettia centerpiece.
For your convenience I am sharing the paper poinsettia template in SVG format so that you can download it for FREE and be able to make it very easily.

With these beautiful paper poinsettias with Cricut you can create a variety of flower arrangements such as centerpieces, wreaths, bouquets, and many more. In addition, you can even use them to decorate your Christmas tree.
Video Tutorial on How to Make Paper poinsettias with Cricut in my Youtube Channel.
Materials Needed:
For the Flowers:
- Cricut Machine: Explore Air o Maker
- FREE template [DOWNLOAD IT HERE]
- Cardstock in Red, Green and Yellow [60 lbs and above preferably]
- Bamboo Stems or Floral Wire
- Hot Glue Gun
For the Christmas Centerpiece:
- Floral Vase or Wooden Block [I will use a wooden rectangle that I will personalize with a stencil cut in Cricut and paint with acrylic paint]
- Floral Foam
- Hot glue gun
- Greenery: This can be artificial, fresh or natural preserved. Tutorial on how to preserve natural foliage HERE.
- Extra Decorations [Pine Cones, Christmas ornaments, etc]. I will also put two roses made of cardstock that I also cut with my Cricut machine. FREE PAPER ROSE PATTERN HERE
To Customize the Wooden Rectangle:
- Vinyl Stencil Design [FREE Design HERE and Tutorial HERE.
- Transfer Tape.
- Acrylic Paint
- Small Brushes
To Preserve Greenery:
- Tutorial Here
- 2 Cups of Boiling Water
- 1 Cup of Glycerin
INSTRUCTIONS:
STEP 1: Working with the Design
Download the FREE DESIGN HERE and upload it in the Cricut Design Space canva.
*DOWNLOAD FREE TEMPLATE HERE*
When already in the Canva, select the design and ungroup. Now change the measurements according to the size you want the poinsettia. We will start with the leaves. I will make a 6 inch diameter flower so I will put those measurements on the leaves.

With the Cricut Explore Air:
If you have the Cricut Explore Air, you will need the scoring Stylus from Cricut. Go to OPERATIONS and for the leaves and petals select BASIC CUT and for the tracing of the center of the leaves and petals select SCORE.


With the Maker:
To cut the poinsettia using the Cricut Maker machine we have three options. We could use Cricut Scoring Stylus, the Scoring Wheel Tip or the Fine Debossing Tip tool.


To use the Cricut Scoring Stylus and the Scoring Wheel Tip, go to OPERATIONS and for the leaves and petals click on BASIC CUT and to trace the center of the leaves and petals select SCORE.
And to cut using the Fine Debossing Tip tool, you are going to select DEBOSS. Always in OPERATIONS.
After you have done the above process, duplicate the layer. You will need 2 layers of leaves with the size you want the flower. [I am using the base measure of 6 “]

Then we will move on to the petals.
Each set of petals should be half an inch shorter than the previous one. That is, if the leaves are 6″ the first set of petals should measure 5.5″. [The set contains 2 layers].
Then the next set should measure 5 “and so on. You can cut as many layers as you want to make the flower. I like to cut between 4 to 6 set of petals.
Cut one or two 1″ inch green circles and 6 to 8 0.75 “red circles. For the center of the poinsettia, cut one green and one yellow that measure 0.75” high by 3.75 “wide.

STEP 2: Cut the Poinsettia Petals and Leaves
When you have finished with the measurements, go on to cut it. I am using heavyweight cardstock so I selected Heavy Cardstock or 100 lb cardstock in step 1. In step 2 it is instructing you to place the Fine Debossing Tip.
If you are using the Scoring Stylus, you should put in clamp A and you should put the the Scoring Wheel Tip and Fine Debossing Tip in clamp B.

After you have finished with the folds, the machine will indicate that you must replace the folding tool with the fine point blade.


STEP 3: Assemble the Paper Poinsettia
Curve the petals using a ruler and then fold the center to obtain defined petals with a realistic touch.
Using hot glue, glue one layer on top of the other starting with the green circle and the leaves.
Place the petals from the largest to the smallest. Intercalate with the circles. Try to align the holes and do not put glue in that area as these holes will help us to insert the floral wire or the bamboo stem.


Roll the center of the flower and glue it on top and finish by putting the bamboo toothpick or the lined floral wire.


Here is your beautiful paper poinsettia cut with your Cricut machine!

With these beautiful poinsettias you can make floral arrangements such as Christmas wreaths, centerpieces, wall decorations and even to decorate your Christmas tree.
*DOWNLOAD FREE TEMPLATE HERE*
STEP 4: Christmas Paper Poinsettia Centerpiece
For this centerpiece I am using a customized wooden rectangle with vinyl stencil cut in Cricut. Press HERE if you would like to download this Merry Christmas design.
Tutorial of How to Make Stencil with Cricut HERE.


Using your creativity, start making the Christmas centerpiece flower arrangement. Begin by putting the floral foam block inside the vase. Make sure you put hot glue on the bottom so it doesn’t move.
First place the poinsettias in the way you like the most and then fill with the foliage either artificial, preserved natural or fresh foliage. For this centerpiece I am using fresh juniper twigs. Juniper smells delicious and is perfect for Christmas arrangements.
Tutorial on how to preserve natural foliage HERE.
In addition to the foliage, I will add extra decorations such as artificial cherry branches, pine cones, and Christmas ornaments that I found at the Dollar Tree Store. I added two roses made from cardstock that I also cut with my Cricut machine. FREE rose template HERE and tutorial on how to make it HERE.


Voila!!!

I hope you enjoyed this Christmas tutorial as much as I did. I have created several ornaments to decorate my home this Christmas and the poinsettias are one of my favorites. Even my Christmas tree is decorated with red poinsettias.
I invite you to explore my BLOG there you will find a wide variety of craft tutorials of all kinds.
Visit me on the following social networks:
Disfruta creando!!!
Daisy Multifacética.

Welcome!
This is Daisy from Daisy Multifacetica Blog and Youtube Channel. As some of you know I love crafting!!!. I am passionate about creating a variety of projects at home. One day I can be doing crafts, another day sewing a garment, customizing items, working with wood, painting, designing custom images or cooking for my family.
My days are definitely not routine but I enjoy them to the fullest doing what I love the most.
It gives me joy to be able to share my knowledge with you through my tutorials and feel blessed to know that they are helpful to you.
Daisy
“Creativity is intelligence having fun“
Albert Einstein
Subscribe to My Blog
Get new content delivered directly to your inbox.
- All Posts
- Baking – Cooking – Cocina
- Birthday DIY Cumpleaños
- Books – Libros
- Boxes – Cajas
- Cards DIY Tarjetas
- Carpinteria – Woodwork
- Christmas – Navidad
- Christmas Decorations – DIY
- Craft for Business – Manualidades para Negocio
- Craft Software Tutorials – Programas
- Craft Tutorials
- Cricut Crafts & Tutorials
- Custom Items DIY Pesonalizados
- DTF
- Easter – Pascua
- Embroidery – Bordado
- Fabric Face Masks
- Fall Decor – Otoño
- Flowers – Flores
- Free Patterns – Patrones
- FREE SVG PNG Designs – GRATIS
- FREE SVG | PNG | Cutting Files
- Gifts
- Graduation
- Halloween
- Halloween crafts
- Home Decor
- HTVRONT
- Kitchen
- Laser Engraver
- Latino Hispanic
- Loklik
- Metal Stamping
- Mugs
- Navidad
- Profitable Business – Negocio Rentable
- Recipes – Recetas
- Reviews
- San Valentin
- school craft
- Screen Printing
- Sewing
- sewing patterns
- Sewing Tutorial – Costura
- Shipping Ideas
- Small Business – Pequeños Negocios
- Sublimation
- T-Shirts – Camisetas DIY
- Templates
- Thank You Cards
- Valentine's Day

DIY Christmas Wall Hanging Decor with Farmyarn and Dollar Tree Ornaments.

DIY Christmas Dreamcatcher – Tree Wall Decor

BEST Printing Techniques: Top 5 Customization Techniques for T-shirts, Bags, Decorative Flags and More.

Elf Box | Caja para Duende, Cut Files, SVG, PNG Designs

Christmas Ornaments Box |Caja para Esferas Navideñas

Cookie Box | Gift Box | Party Favor Box, Cut Files, SVG, PNG Designs

How to Make Your Own Tags, Stickers and Labels using Cricut Print then Cut Feature.
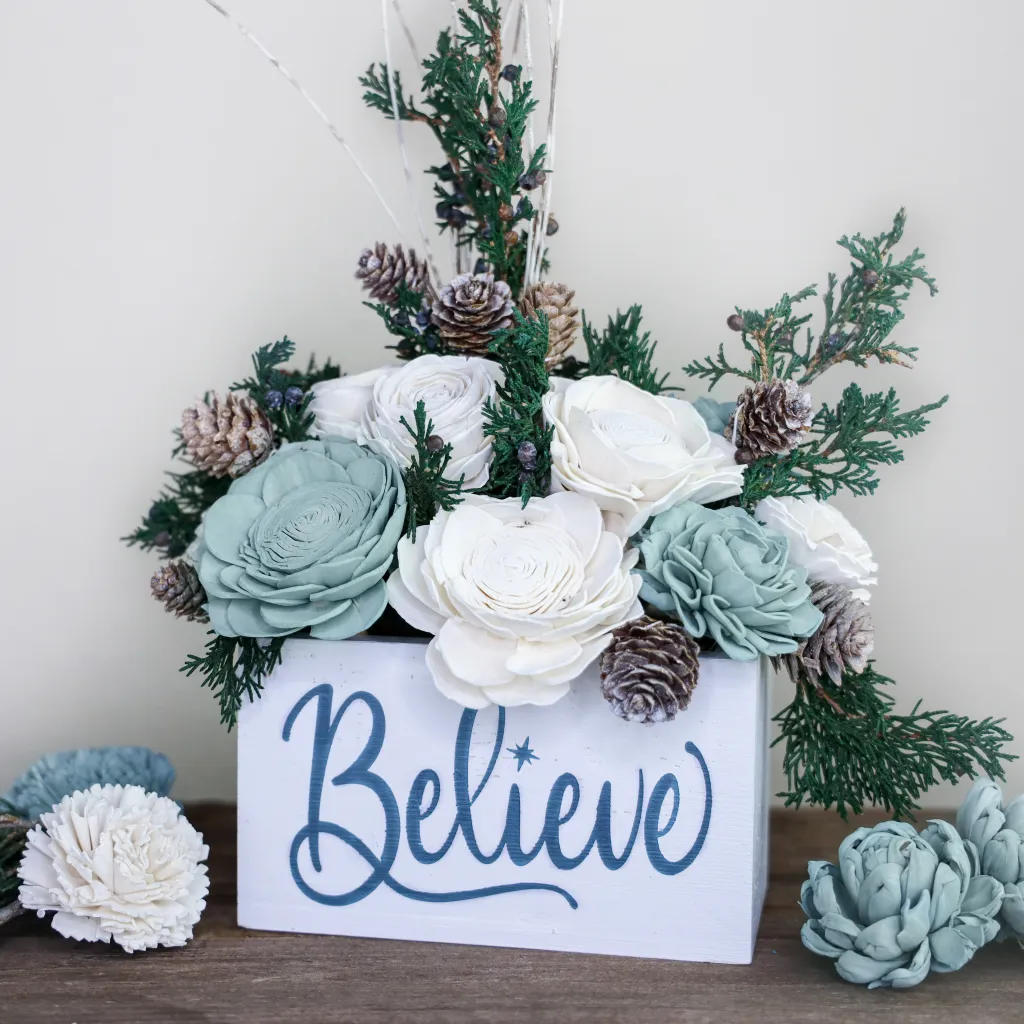
Step by Step Tutorial on how to Make a Christmas Centerpiece with Sola Wood Flowers

COMPLETE Guide on how to make Delicate and Elegant Custom Water Bottle Labels for all occasions. {{Print then Cut with Cricut}}

The Best Fluffy and Tasty Orange Cake Recipe.
